Brewtopia Events
Homebrewing information included on this page...
Equipment
Brewing
Our other homebrewing pages....
Bottling
Tips
Recipes
Brewtopia Events Beer
Travel Guides:


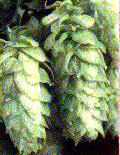
Choose hop pellets or flowers that are fresh and green with a
floral,
citrusy, and/or spicy aroma (not cheesy)...
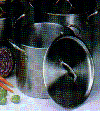
Choose a large 4 to 5 gallon brewpot (stainless steel is
best)...
|
|
Equipment
Needed for
Simplified 3 Gallon All-Grain Homebrewing:
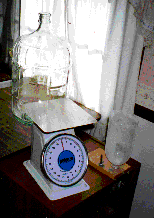
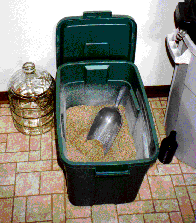
- 4 to 5 gallon brew pot with lid.
- 5 gallon insulated plastic water
cooler.
- 10 inch fine mesh stainless
steel
strainer with handle.
- Heavy duty plastic or metal
spoon
with long handle.
- 11 inch plastic funnel for
carboy.
- 5 gallon glass jug (carboy) with
carboy cap and air
lock.
- 3 gallon glass carboy (optional)
for
secondary fermentation.
- Wide range (0-220 degrees F)
thermometer.
- Small nylon fishnet from aquarium shop.
- Strong cleaner/sanitizer from
homebrew shop (not just bleach). Five Star Star-San no
rinse sanitizer is great.
|
|
 Brewing Brewing
Keep in mind that all-grain brewers usually make use of huge
brewpots
that boil the entire 5-6 gallon batch of beer on outdoor propane
burners.
They also take lots of time to run hot water through their grains
(sparging)
in complex equipment systems to get every bit of fermentable sugar out
of the grains they can. The three gallon system that is outlined here
is
so simple that it can all be done indoors and requires less equipment
because
of three points:
- We are going to make around three gallons instead of
five.
- We are going to use 15-20% more grain than normal (at a
minimal cost)
instead
of investing time and equipment in extensive sparging.
- We are not going to boil our entire 3 gallon batch of beer.
Rather, a
concentrated
two gallon batch of beer will be boiled on the stove, and a gallon of
cold,
jugged drinking water will be added to this in our carboy
fermenter.
These "shortcuts" will mean that you will not need all the usual,
complex
all-grain equipment. This does NOT mean you will be making three
gallons
of inferior beer. I have won numerous awards and compliments for my
beers
made in this fashion. So get ready for a new and engaging homebrew
experience!
| "All-Grain"
is the
Key to Wonderful Homebrew Flavor:
The easy steps outlined here will
take more time
than making homebrew from extract. Count on six hours at first and four
to five hours once you get used to the system. Much of this time
involves waiting
while your grains soak in hot water and while your beer boils. It is
NOT
six hours of constant work, so have a few beers ready for
sampling.
Recipes and Grains: When you
look at all-grain
recipes from books, divide the grain down from five to three gallons
and
then ADD 15-20% to each grain type. Do this to make up for the fact
that
we are not going to sparge very well. Or, you can use one of my exact
recipes
elsewhere on this page for your three gallon all-grain batch. Take your
recipe to your friendly neighborhood homebrew shop and ask them to
measure
out the grains and crush them for you. If these exact grains are not
available,
I'm sure the supply store owner can recommend substitutes that will
turn
out just as nice.
|
|
Other items for your recipe: Also be sure to pick up
your hops,
yeast nutrient, gypsum salts, and irish moss. Gypsum is
good to use with ales -- especially if your water is soft. You'll also
need two gallons of jugged, filtered, ozonated spring or
drinking
water from the grocery store. Put this water in the refrigerator the
night
before you brew to get them good and cold.
Yeast: Pick a good liquid yeast from Wyeast or White
Labs. These yeasts produce much better results
than
dry yeast. Start Wyeast a day or two before you brew (by popping the
interior starter pouch), and give some
serious thought to making a simple starter culture in a beer bottle
with
malt extract (see Papazian's New Complete Joy of Homebrewing
for
tips on this). Oh yeah, please don't forget your corn sugar for priming
at bottling time.
Important Steps: OK, you have all your equipment and
ingredients,
and your two gallons of jugged water are chilling in the icebox. You've
gotten your liquid yeast culture almost to full steam. Be sure to also
fill your brewpot with three gallons of cold tap water the night before
you are going to brew and put the lid over it loosely. This will allow
the chlorine to dissipate. You can also use jugged drinking
water. Now here are the brewing steps:
- Pour your crushed grains into your clean five gallon,
insulated water
cooler.
Be sure there is NO soap residue on any of your brewing equipment (this
can reduce the head retention of your finished beer).
- Heat your chlorine-free three gallons of water in your
brewpot (with a
teaspoon of gypsum mixed in) to 165-168 degrees F and pour quickly onto
your grains. Pour in just enough water to soak all through the grains
and
leave about one inch of water on top. Stir well to be sure there are no
dry pockets
in the grain. This mixture should now be close to 152-155 degrees F (if
it is over 158, stir in a few cubes of ice). Put the lid tightly on the
cooler and wait one hour. This will convert starches in the grain into
fermentable sugars.
- When your grain is almost done soaking (mashing), get a
large saucepot
and boil about a gallon of tap water for five minutes or so. Then add
some
ice cubes to bring this water down to around 170 degrees F.
- Put your large brewpot in your sink, open your water cooler
filled with
mashed grains and liquid, and using a large cup or small pot scoop out
the grains and liquid a little at a time and put them into your
strainer
positioned in your brewpot. Allow the sweet liquid to flow from the
grains into your brewpot. Stir the grains a
bit
and pour a bit of your 170 degree F water through each scoop of grains
to rinse. Your goal is to end up with about 2 1/2
gallons
of grain juice (wort) in your brewpot. If you run out of your 170
degree
F water before this, you can continue to sparge your grains with HOT
tap
water as a last resort. Try to get as much sugar out of your grains as
you can, but don't over do it. Remember that we have added extra grains
to make up for this poor sparge. It works!
- Compost your spent grains or feed them to your chickens,
horses, or
goats.
- Now stick your funnel, large spoon, brewpot lid, and
strainer in your
dishwasher
on the high heat cycle with a little dishwashing powder. This will
sanitize
them for use after your beer has boiled.
- Use your small nylon fishnet to fish out most of the loose
grain husks and bits from the wort in your brewpot.
- Boil your 2 1/2 gallons of wort and hops UNCOVERED on your
kitchen
stove
(don't let it boil over). Don't stir this boiling wort very often. Add
a teaspoonful of yeast nutrient and a teaspoon of irish moss (for
clarity) 15 minutes before the end of the boil.
- At the end of the boil, cover the brewpot with its lid out
of the
diswasher
and place it in an ice and water bath in your sink for 30 minutes. Keep
adding ice as it melts.
- Pour 1/3 of one gallon jug of your cold drinking water into
your
cleaned and sanitized five gallon carboy. Put the lid back on the water
jug and shake
the jug vigorously for one minute to aerate the remaining water well.
Add
this water to your carboy.
- Using your sanitized funnel and strainer from the
dishwasher, strain
your
concentrated wort into your carboy on top of the cold one gallon of
water.
Leave the last cup of wort in the bottom of the brewpot (this contains
proteins and hop residue). This should give you close to three
gallons total in your carboy (if not, top up with
some water from your second cold jug). Wort temperature in the
carboy should be 60-75 degrees F.
- Pitch in your yeast culture.
- Plug your carboy the normal way with your carboy cap/plug
and airlock
with
water. Set the carboy aside and watch the fermentation take off within
24 hours or so! If you are brewing in the summer, you may want to place
your carboy into a bucket of cool tap water and place a towel around
the
top of the carboy so it soaks up water. Place this near a fan and water
will evaporate off the towel and cool the fermenting beer down a few
degrees.
This will produce better flavors in many beers.
- If your recipe is a low to medium gravity beer, there is
really no need
for a secondary fermenter. If you are making a strong beer, or if you
want
to have beer with less sediment in the bottles, after five days or so
siphon
your beer into a sanitized three
gallon carboy for another week before
you bottle.
It's that easy! Try different grains, read up on other
recipes, and
above all HAVE FUN and make delicious beer!
*** Click here
for recipes ***
*** Click here
for great bottling tips ***
|

